
Configuring locked print and adding user code - Windows
Ricoh devices in Computer Science are restricted to only allow printing through a copy/printing code provided to each user in the department. This tutorial will take you through the steps of adding a print code on your windows machine so that your print jobs will complete and set up locked (confidential) print. Locked print allows jobs to be sent securely to the printer and held there until you actually arrive at the printer to pick them up.
Steps:
1. Go to start and select Devices and Printers:

2. In the menu right click on the copier and select Printing Preferences:

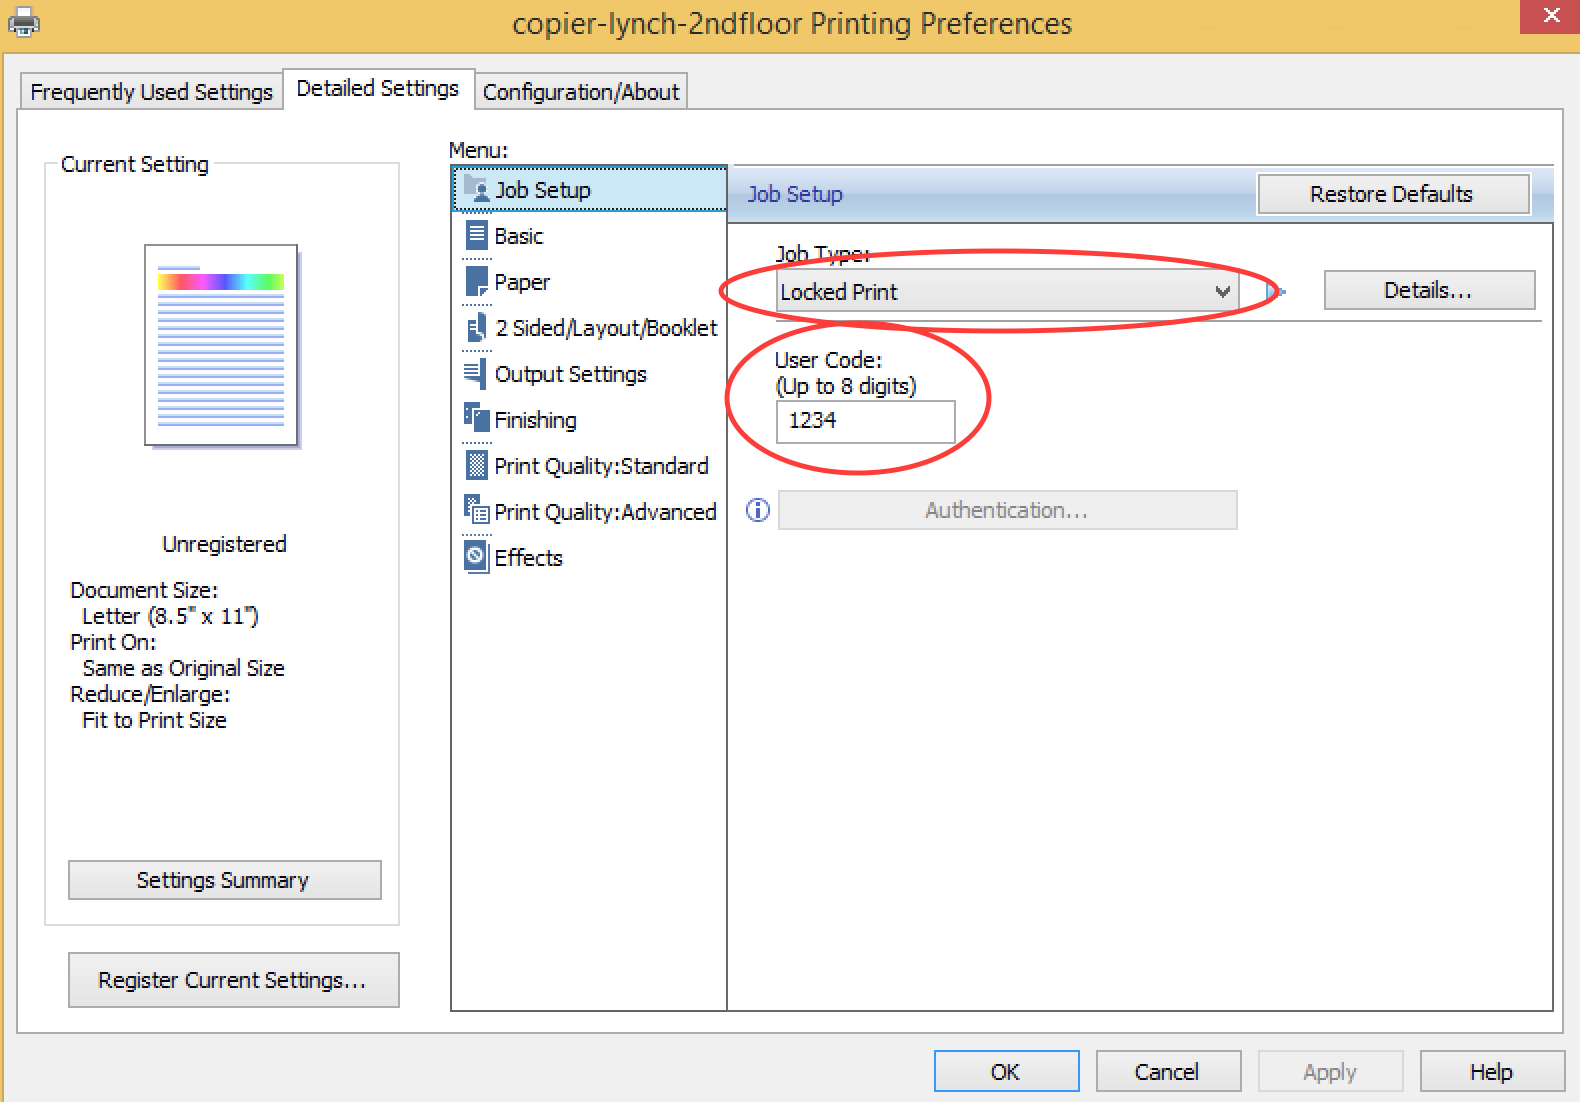
3. This will open up another menu. Under Detailed Settings click on Job Setup:

4. Select Locked Print from the Job Type menu and enter your copier code under User Code.
5. Click "Details" next to Locked Print, then enter your PennKey under User ID and your copier code under Password

6. Click Apply then OK. This will set the User Code for the Ricoh and you will now be able to print:
